Example
Example 1
Measuring micrometer instrumental errors and spindle screw feed errors.
Micrometer instrumental errors can be corrected by measuring 2.50mm,5.00mm, 10.00mm, 15.00mm, 20.00mm and 25.00mm for comparison with actual measured values.
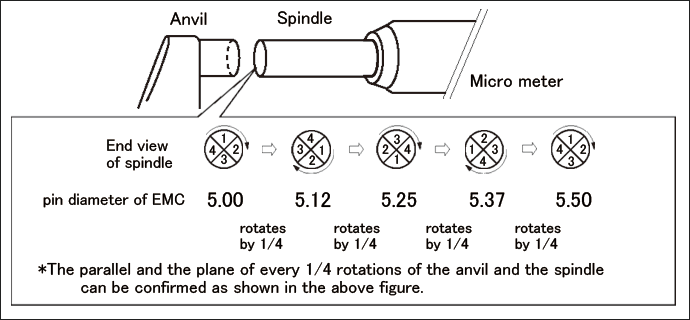
Example 2
Checking the parallelism and plane for each 1/4 spindle and anvil rotation.

This product comes with measurement data, calibration certificates and traceability system diagrams as standard.